Understanding the installation manual is crucial for a safe and efficient setup of your Wallbox Pulsar Plus charger, ensuring compatibility with energy management systems․
Overview of the Pulsar Plus Charger
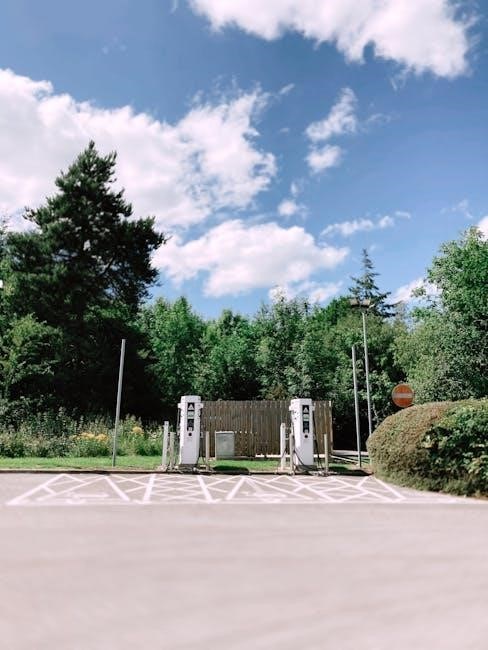
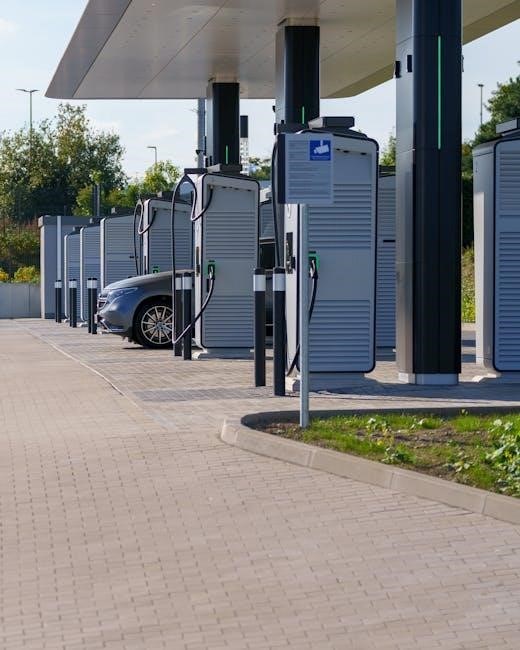
The Wallbox Pulsar Plus is an advanced AC electric vehicle charger designed for both home and commercial use․ It offers a smart and compact solution for efficient EV charging, boasting features like dynamic power sharing and integrated energy management capabilities․ This charger supports various socket and tethered versions, catering to diverse vehicle compatibility needs․
As highlighted in installation guides, the Pulsar Plus prioritizes user-friendliness and safety․ It seamlessly integrates with Wallbox’s ecosystem, allowing for remote control and monitoring via the Wallbox app․ Understanding its features, as detailed in the manual, is key to maximizing its benefits․ Proper installation, following the provided guides, ensures optimal performance and longevity of the device, alongside safe operation․
Importance of Following the Installation Manual
Adhering to the Wallbox Pulsar Plus installation manual is paramount for a secure and functional charging setup․ The manual details critical steps, from obtaining necessary permits and approvals to understanding local electrical codes․ Ignoring these guidelines can lead to improper installation, potentially causing electrical hazards or voiding the product warranty․
The guide provides comprehensive instructions for connecting electrical wiring, managing cables correctly – inserting only one cable per grommet – and ensuring compatibility with existing energy meters․ It also outlines the final activation process within the Wallbox app․ Following these steps guarantees a safe, efficient, and compliant installation, maximizing the charger’s performance and protecting both property and users․
Pre-Installation Requirements
Prior to installation, secure required permits, approvals, and thoroughly check all local electrical codes and regulations for compliance with the installation guide․
Obtaining Necessary Permits and Approvals
Before commencing any electrical work related to your Wallbox Pulsar Plus installation, it is absolutely essential to determine if permits and approvals are required by your local authorities․ Regulations vary significantly depending on your location, so contacting your city or county’s building department is the first step․
These permits ensure the installation meets safety standards and adheres to the National Electrical Code (NEC) or equivalent local codes․ Failure to obtain necessary approvals can result in fines, delays, and potential safety hazards․ The installation guide emphasizes compliance with applicable codes, regulations, and ordinances․ Document all approvals and keep them readily available for inspection․ Thorough preparation in this area will streamline the entire process and guarantee a legally compliant and safe charging setup․
Checking Local Electrical Codes and Regulations
Prior to initiating the Wallbox Pulsar Plus installation, a meticulous review of local electrical codes and regulations is paramount․ These codes dictate specific requirements for wiring, grounding, and circuit protection, ensuring a safe and compliant installation․ Consult your local building department or a qualified electrician to understand the applicable rules in your area․
Pay close attention to requirements regarding dedicated circuits, overcurrent protection, and the type of conduit needed․ The installation manual stresses adherence to these standards․ Ignoring local codes can lead to failed inspections, costly rework, and potential safety risks․ Confirm that your electrical panel has sufficient capacity to handle the additional load of the EV charger․ Proper code compliance guarantees a secure and long-lasting charging solution․
Tools Required for Installation
Essential tools include electrical testers, screwdrivers, and a drill, alongside safety equipment, to properly and safely install your Wallbox Pulsar Plus charger․
Essential Electrical Tools
A comprehensive toolkit is vital for a successful Wallbox Pulsar Plus installation․ You’ll require a multimeter for accurate voltage testing, ensuring power supply compatibility․ Insulated screwdrivers, both flathead and Phillips head, are necessary for secure connections within the unit and to the electrical panel․ Wire strippers and crimpers are essential for preparing and connecting the electrical wiring correctly․
Furthermore, a voltage tester will confirm power is safely disconnected before work begins․ Consider a circuit tracer to identify wires within the wall․ Don’t forget appropriate wire connectors and electrical tape for secure and insulated connections․ Having these tools readily available streamlines the installation process and prioritizes safety throughout the entire operation․
Safety Equipment
Prioritizing safety is paramount during Wallbox Pulsar Plus installation․ Always wear insulated gloves to protect against electrical shock, and safety glasses to shield your eyes from debris․ A properly fitted face shield offers additional protection․ Ensure you have appropriate work boots with non-conductive soles for grounding․
A hard hat is recommended, especially when working overhead․ Keep a fully stocked first-aid kit nearby for immediate response to minor injuries․ Familiarize yourself with the location of the main electrical disconnect switch․ Before commencing any work, verify the power is OFF using a reliable voltage tester․ Adhering to these safety measures minimizes risks and ensures a secure installation process․
Unboxing and Component Check
Carefully verify all package contents against the provided list, and thoroughly inspect each component for any signs of shipping damage before installation begins․
Verifying Package Contents
Upon receiving your Wallbox Pulsar Plus, the first step is a meticulous verification of the package contents․ Ensure you have received all listed components to prevent delays during installation․ This typically includes the Wallbox unit itself, mounting brackets designed for secure wall attachment, and the necessary hardware – screws and wall plugs – for a robust installation․
Furthermore, confirm the presence of the user manual and installation guide, vital resources for a smooth process․ Check for any included cable, depending on the model purchased․ A thorough check against the packing list, often found within the box or available online, is highly recommended․ Documenting any discrepancies immediately will streamline potential replacements and ensure a hassle-free setup experience․ Missing components should be reported to your supplier promptly․
Inspecting for Damage
Before commencing the installation, a careful inspection for any shipping damage is paramount․ Thoroughly examine the Wallbox unit for visible cracks, dents, or other physical impairments․ Pay close attention to the charging port and any exposed wiring, ensuring they are intact and undamaged․ Inspect the mounting brackets for bends or breaks that could compromise their structural integrity․
The packaging itself can offer clues; crushed or torn boxes suggest potential internal damage․ Document any observed damage with photographs, providing clear evidence for potential claims․ If damage is detected, do not attempt installation․ Contact your supplier immediately to report the issue and arrange for a replacement unit․ Installing a damaged charger could pose a safety hazard and void any warranty․
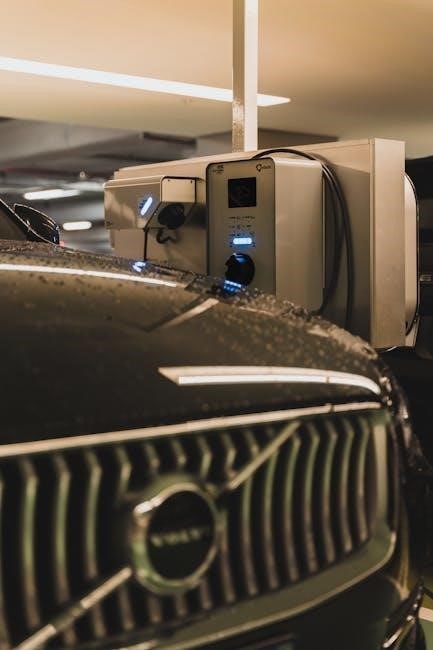
Mounting the Wallbox Pulsar Plus
Select a suitable, stable location for wall mounting, ensuring adherence to the installation guide’s specifications for height and accessibility․
Selecting a Suitable Mounting Location
Careful site selection is paramount for a successful Wallbox Pulsar Plus installation․ Prioritize a location offering convenient access for both vehicle charging and future maintenance․ The mounting surface must be structurally sound – capable of supporting the charger’s weight plus a safety margin․
Ensure adequate space around the unit for comfortable cable management and operation․ Avoid areas exposed to direct sunlight or extreme weather conditions, as these can impact performance and longevity․ Consider proximity to your electrical panel to minimize wiring distances and potential voltage drop․
Verify sufficient ventilation to prevent overheating․ The installation guide details specific clearance requirements; strictly adhere to these guidelines for optimal and safe operation․
Wall Mounting Procedure
Begin by securely attaching the mounting backplate to the chosen wall, utilizing appropriate fixings for your wall type – concrete, brick, or wood․ Ensure the backplate is perfectly level to guarantee a flush and stable installation․ Consult the installation manual for recommended screw sizes and drilling depths․
Once the backplate is firmly in place, carefully align the Wallbox Pulsar Plus unit with the mounting points․ Gently push the charger onto the backplate until it clicks securely into position․ Double-check that the unit is firmly locked and cannot be easily dislodged․
Finally, verify the overall stability of the mounted charger before proceeding with electrical connections․
Electrical Connections
Proper power supply and wiring are essential; adhere strictly to the manual’s guidelines for safe and correct electrical connections to your Wallbox Pulsar Plus․
Power Supply Requirements
Determining the correct power supply is paramount for optimal Wallbox Pulsar Plus performance and safety․ The installation manual details specific voltage and amperage requirements, varying based on the chosen charger model – typically single or three-phase power․ Carefully assess your electrical panel’s capacity to ensure it can handle the additional load without overloading existing circuits․
Dedicated circuit breakers are mandatory, sized appropriately for the charger’s maximum current draw, as outlined in the manual․ Incorrect breaker sizing can lead to tripping or, worse, electrical hazards․ Always consult a qualified electrician to verify your electrical infrastructure meets the necessary specifications before commencing installation․ Ignoring these requirements could void the warranty and compromise safety․
Connecting the Electrical Wiring
Precise wiring connections are essential for a functional and safe Wallbox Pulsar Plus installation․ The manual provides detailed diagrams illustrating the correct wiring sequence – typically involving live, neutral, and ground wires․ Always de-energize the circuit breaker before handling any electrical wiring to prevent electrocution․
Use appropriately sized wiring conforming to local electrical codes, ensuring secure connections within the Wallbox terminal block․ Double-check all connections for tightness and proper insulation before restoring power․ Incorrect wiring can damage the charger or pose a significant fire risk․ A qualified electrician’s expertise is strongly recommended for this critical step, guaranteeing adherence to safety standards and proper functionality․

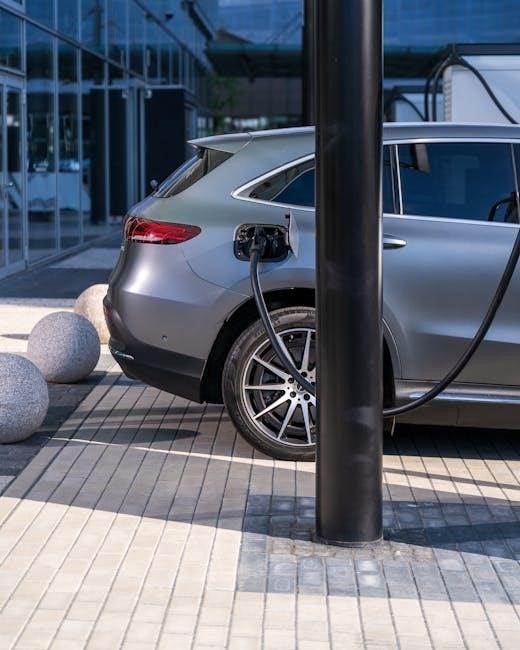
Cable Management
Secure and organized cabling is vital; the manual stresses inserting only one cable per grommet for safety and a clean, professional aesthetic․
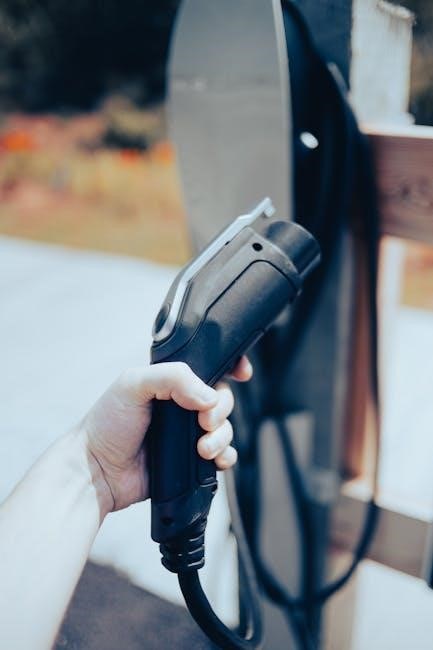
Inserting Cables Through Grommets (One Cable Per Grommet)
The Wallbox Pulsar Plus installation guide explicitly emphasizes a critical aspect of cable management: utilizing the provided grommets correctly․ It is imperative to insert only one cable through each individual grommet․ This seemingly simple instruction is paramount for maintaining the integrity of the charger’s enclosure and ensuring long-term safety․
Overfilling a single grommet with multiple cables can create undue stress on the rubber seal, potentially compromising its ability to prevent water ingress and dust accumulation․ This could lead to corrosion and electrical hazards․ Following this guideline contributes to a neat, organized installation, enhancing both the aesthetic appeal and the functional reliability of your Wallbox Pulsar Plus․ Proper grommet usage is a key detail for a successful installation․
Securing Cables for Safety and Aesthetics
After carefully inserting cables through the designated grommets – remembering the crucial rule of one cable per grommet – the next step involves securing them properly․ This isn’t merely about tidiness; it’s a vital safety precaution․ Loose cables pose a tripping hazard and are susceptible to damage from accidental impacts or environmental factors․
The installation guide recommends utilizing appropriate cable ties or clamps to neatly bundle and secure the cables along a designated pathway․ Ensure these securing mechanisms don’t over-tighten, potentially damaging the cable insulation․ A well-organized cable arrangement not only enhances the visual appeal of the installation but also protects the cables, contributing to the longevity and safe operation of your Wallbox Pulsar Plus charger․
Energy Meter Compatibility
Refer to the Meter Compatibility Table within the installation guide to verify seamless integration with your existing energy management systems and meters․
Checking the Meter Compatibility Table
Prior to electrical connections, meticulously consult the Meter Compatibility Table detailed within the Wallbox Pulsar Plus installation guide․ This table is essential for confirming whether your current energy meter is fully compatible with the charger․ Compatibility ensures accurate energy monitoring and optimal performance of any integrated energy management systems․
The table typically lists supported meter brands, models, and communication protocols․ Incorrect meter compatibility can lead to inaccurate readings, hindering the benefits of smart charging features․ Carefully cross-reference your meter’s specifications with the information provided․ If your meter isn’t listed, explore alternative compatible options or consult with a qualified electrician for guidance on potential solutions․
Integrating with Energy Management Systems
Successful integration with energy management systems unlocks the full potential of your Wallbox Pulsar Plus․ The installation manual details the necessary steps for connecting the charger to compatible systems, enabling features like dynamic load balancing and solar energy optimization․ This ensures efficient energy usage and potentially reduces charging costs․
Proper configuration involves establishing communication between the Wallbox and the energy management system, often utilizing specific communication protocols․ Refer to both the Wallbox manual and your energy management system’s documentation for detailed instructions․ Verify correct data transmission and functionality after setup․ A seamless integration allows for intelligent charging schedules based on grid conditions and renewable energy availability․
Configuration and Activation
Finalizing installation requires accessing the Wallbox app for configuration and activation, ensuring proper functionality and connectivity after the physical setup is complete․
Accessing the Wallbox App
Initiating the configuration process begins with downloading and installing the official Wallbox app on your smartphone or tablet․ This application serves as the central hub for controlling and monitoring your Pulsar Plus charger․ Upon opening the app, you’ll need to create an account or log in if you already have one․
The app guides you through a step-by-step process, prompting you to connect to your Wallbox via Bluetooth or Wi-Fi․ Ensure your mobile device’s Bluetooth is enabled and that you’re within range of the charger․ The app will then search for available Wallbox devices․ Once located, select your Pulsar Plus and follow the on-screen instructions to complete the connection and begin the activation sequence․
Finalizing Installation and Activation
After completing the electrical connections and app configuration, the final step involves activating your Wallbox Pulsar Plus․ Within the Wallbox app, navigate to the activation section and follow the prompts․ This typically involves verifying your installation details and confirming your energy plan settings․
Don’t forget to finalize the Solar integration if applicable, ensuring seamless compatibility with your renewable energy source․ Once activated, the app allows for remote monitoring, scheduling charging sessions, and accessing usage statistics․ A successful activation confirms your charger is ready for use, providing convenient and efficient electric vehicle charging at home․